Showing posts with label Tech Talk. Show all posts

Saturday, June 1, 2013

PD-M959 Pedal Rebuild and Frozen Knee Saver Removal

I have a set of Shimano PD-M959 (Before XTR) pedals that I put a set of KneeSavers on that got frozen on the spindle. I put the kneesavers on to give myself ankle clearance for when I wore my winter shoes or shoe covers. I discovered this winter I really don't need to be spaced out that much, so I decided to remove them. What I discovered was they were frozen to the pedal spindle.
m959_01
The problem is this model of pedal does not have the usual 15mm flats on the spindle to tighten the pedal to the crank arm. Instead the pedal can only be tightened using a 10mm allen wrench on the back side of the spindle. However the backside of the KneeSaver / extensions is solid and covers the allen wrench access. So the question is, how do I get it tight? A strap Wrench and as you can see the KneeSavers have 22mm flats.

m959_02
The first thing I did was drill a small 3/32" hole through the backside of the extension to allow a penetrant like PB Blaster, WD-40, or Liquid Wrench access to the blind side of the threads. After a week of soaking it didn't budge. Time for the frozen bolt torch technique.

I had to remove the spindle from the pedal body and disassemble it. First you need a 17mm wrench and since this is the right/drive pedal the threads are left hand thread. Why left hand thread? If they were right hand thread and through a process of "mechanical precession" they would loosen up over time. So it's Righty Loosey.

m959_04
Unassembled and ready for the torch. Those are 3/32" bearings, even with a magnetic bowl one managed to escape me. No big deal since 12 fill the whole bearing race.

m959_05
The idea with the torch is, you want to heat the extension so it expands breaking the bond between the two. You want to heat the extension, not the spindle as best you can, so keep the heat on the extension. Yu want to heat the extension so you get a little discoloration. Too hot or you will be deforming the threads and possibly welding the threads together...you don't want that. Once you start getting some discoloration you might hear a popping sound of the two becoming unbounded.

m959_06
Let it cool, but while it's still a little hot, see if you can work it loose. I was able to get about 1/16 of a turn, and that was just enough to get some momentum. Be careful here, the vice grips are clamped on the flat part, not the bearing races.

m959_07
1/16th of a turn became 1/8th, became 1/4 turn and so on. After about 15minutes of work the kneesavers/extensions are off.

m959_08
You have to put those 12 bearings on the bearing race in that barrel looking thing, then slide the barrel thing over the spindle. Use a fair amount of grease, this will allow the bearings to stick and not fall out. Remember to put the plastic bearing retainer back in with the beveled side up. Then just put in the last set of 12 bearings.

m959_09
Remember it's Left hand thread. So it's Lefty Tighty! There you have it. I used PhilWood grease so it's buttery smooth.

Tuesday, February 26, 2013

Weighting my Crank

What is the real difference between the 3 generations old Dura-Ace 7800 and  3 generations old Ultegra 6600 crankset? Is Dura- Ace just light weight Ultegra, or what? 
Dura Ace 7800 Crankset
Ultegra 6600 Crankset
As far as weight goes, just 65grams separate the two. 684 grams for Dura-Ace, and 749 grams for the Ultegra. So roughly 2-1/2 ounces. Also the finish on the Dura-Ace is a lot nicer. The Dura-Ace is also shaped a little different. The Dura-Ace is scalloped, where the Ultegra is more like a starfish. While it appears there is extra work involved making the Dura-Ace shape. You have to wonder if it has a measurable difference. Well like I said, the finish and shape is a lot better than the ultegra.
 
This is something unexpected, the Dura Ace left crankarm is 1 gram heavier. There are shaped a little different, and 1 gram is hardly concern, but like everybody probably expected the Dura Ace to be a little lighter.
 
The back side of the big chainrings are different. Both Cranksets are 53x39, but if you have engineered the placement for all the ramps and pins to guide the chain through the gear changes, then there would be one optimum geometry. Is one designed to work better than the other? Notice also the shaped of the pins. The Dura Ace (top) uses round pins, while the Ultegra (bottom) uses rectangular pins. I think both work really well, but then I'm old school. I don't exect them to shift while going up hill out of the saddle.


So what accounts for the weight difference. If the left arms are about the same, then the right side should be about the same, so that leaves the spindle. The Dura-Ace spindle is noticably thinner as you can see. People will say the crank is a good place to save rotational weight, but in this case the extra weigh is in the spindle, where it would be hardly noticed as far as rotational crank weight is. So the extra weight on the Ultegra Crank is more static, than rotational.
 
Also notice the backside of the spiders. This view really shows the difference between what I call a scallope shape of the Dura-Ace, and Starfish shape of the Ultegra.
 
So...Is the Dura-Ace worth (about twice) the extra expense?

Monday, November 19, 2012

The Ultegra FH-6500 Rear Hub Rebuild

Call me a non-contemporary, or whatever. As far as having a set of road racing wheels, I'll consider having a set of wheels that follows the whole wheels concept. However for training, or Cyclocross I like the conventional 3cross (or 2 cross), 32 spoke wheels. No special spokes, just conventional J-bend spokes. I got a set of wheels with Ultegra FW-6500 series hubs last week.

I thought the rear hub was just loose and needed an adjustment, but upon closer inspection the rear hub needed more than an adjustment. I had a bent axle. bad enough it wore the threads on the axle flat. Other than a right side cone and bearings I didn't see any other damage. Since the hub is a 3 generation old, non Dura-Ace Shimano hub, I figured I'd have problems finding replacment parts...Well sorta, kinda. 
The new axle (bottom) is a little longer, I'm not sure by how much, I suspect 5mm for MTB, for road just cut it down. easy enough.
I could not get Shimano replacment small parts....Surprise...So Thanks to Wheels Manufacturing. Also Midwest Cyclery, and Zeke, I'm able to rehabilitate my hubs. Here are the part numbers pictured to the left in case you need them. Note the Right Rear cone bag says "Ultegra HB 6500". I'm 99% sure it's should say FH-6500. There has never been a HB-6500 rear hub as far as I can tell. Any reference to HB-6500 is always in respect to the front hub parts, and FH-6500 is in respect to rear hub parts.

The parts are not exactly like the originals, but beggers can't be choosers. The left side has 1 difference. The outside dust cap. Easy enough, you can tap it off and put it on the new cone.

Also notice on the parts bag it says "REQUIRES O-RING SEAL". My seal are fine, but before you start tapping, remove your seal to prevent damage.
Easy does it....Tap, Tap, Tap....It comes off pretty easy. Any harder and I would what to support the dust cap all the way around to prevent it from bending.  


There it is, Left side (non-drive) good as new. The dust cap would not slide down on the cone at first. The hole was just barely too small. So I had to sand the inside just a touch. It's best sanded with a small Dremil barrel sander (Fine Grit) so it's still a tight fit....remember to put back on the o-ring.

Now the right side. Notice the pitting. The left side wasn't this bad, heck I might not have even needed to replace it. But it's you're going to over haul it, it's best to replace both cones and bearing. Lucky for me both races were in great shape.  

There are two differences on the right cone. 1 is the shoulder (see red arrow). On the new cone the shoulder is near the bearing surface. On the old one the shoulder is located where it supports the o-ring. The 2nd difference is that it's about 1 millimeter longer. No biggy.

The problem so to speak...for lack of a better word...is the shoulder on the new cone doesn't support the o-ring all the way around. you can see it's not supported where the cone wrench flats are. I'm not sure it's that big of a deal, but Shimano had it right.

Now that the dust cap it bolted on, you can see it's not really on issue.
I've always used Phil Wood grease. I'll continue to use Phil Wood, and I'll tell to use Phil Wood. I tried others, but this is just right for the long haul. I mean Philwood is known for their bearing quality, what grease do you think they use?


Well...I know that right side cone is longer. So what did I expect?  From locknut face to locknut face it should be 130mm, it's 131mm. 1/2mm each side isn't going to hurt anything.

Now to that longer axle business. On the left side you can see it's too long, so screw on a 4mm or 5mm thick locknut, and cut the end off with a hacksaw. This way it's keep you from drifting, and will clean the threads when you unthread it after you are done cutting. For example that burr in the photo.

One last test. it's nice to have a set of dropouts you can test to see if the quick release locks it all down. The hub also rolls smooth as butter.
Axle (LE) is like a Hub Axle.
Axel  (EL) is a a name, .....not Axl Rose.
Helmet (ET) is something you wear on your head for protection. Like a Ateliers Ruby Helmet
Helmut (UT) is a name Helmut Lang.
...but really...did you check out Ateliers Ruby Helmets

Friday, March 23, 2012

Another Fixed Gear Chat

Before I get into this let's define the difference between "Single Speed" and "Fixed Gear", because sometimes people get these two terms confused because both setups commit you to use only one gear.


Most people are familiar with the "Single Speed". This setup uses a freewheel (pictured above) allows you to freewheel or coast. For example you can ride a bicycle down a hill without having to pedal down it.


Less familiar to people is the "Fixed Gear". With this setup the gear (pictured above) screws directly on the hub (It's fixed to the hub) and there is not a freewheeling mechanisim. For example if you go down a hill, your pedaling down the hill. as long as the rear wheel is turning, the cranks are turning. You can not coast.

Both single speed and Fixed have their Pros and Cons, but you have to ride both these bicycles differently than multi-speed bicycles because you can't shift gears when things get tough. You have to develope stratagies using your momentum to get over the top of all kinds of hills. You have to develope a flow so to speak.

There are basically 3 types of hills, Gradual hill, Rolling hills, and steep hills.

A gradual hill, is a hill that for the most part you ride seated from the bottom to the top.

Rolling hills are the meat and potatoes of the single speed/fixed gear experience. You use the momentum of the descent of the previous hill to propel you over the top of the next hill. Right at the beginning of the climb you will start losing speed/momentum. You have to mentally calculate when and how much power to the pedals. sometime you gradualy apply power, and sometime you need to stomp. The calculations will include current fitness, speed, and length climb.

Steep hills are just steep hills. These hill require brute force to finish. If the hill get too steep you can always tack or switchback up the hill, provided you don't have on coming traffic.

Beware though, a rolling hill can become a steep hill if you choose a gear that is too large. Conversly a steep hill will become a rolling hill the more fit, and single speed/fixed gear savy you become.

So how do you pick a gear? You pick a speed you want to average, at a cadence you find comfortable. The last time I rode 100 miles I wanted to average over 20mph on my fixed gear. I found 48x16 (or 3:1...I could have also ridden 45x15, 42x14, or 51x17 with the same 3:1 result) at a pedal cadence of 85 rpm, produces 20.1 mph. This configuration sounds a little big, but I know I'm going to make a few stops so I'm going to have to ride faster than 20mph in order to make up for lost time at a food stop. I also have to think about the hills on the route. I was familiar with 48x16, and I've been able to ride up any hill in the area without too much trouble. I rode the 100 miles in 4 hours, 52 minutes. I remember having 2 hills that were trouble. I think I might have been able to push 50x16.

I'm thinking about doing a 128 mile ride in the near future. My fitness it's what it was, and I'd like to average 17.5 mph. I found a 42x16
at a cadence of 85rpm produces 17.6 mph.

So why do I look at 85 rpm when people say optimum cadence is between 90 to 100 rpm. Like I say, you have to ride these bicycle differently. At the bottom of some hills you might be pedaling at 190- 200 rpm, and some hills you might be slogging away at 30 rpm to get over. In my experience basing the target speed at 80 rpm works well.

So how do you calulate speed? Find the circumfernce of your wheel, for example the diameter of a 700x23c tire is 672mm, or 2111mm circumference. (672 x3.1415 =2111) convert to feet (6.926'). Now multiply that times your gear ratio to get your travel per crank revolution. for example 48x16 or 3 x6.926' =20.78'. To get MPH for a certain cadence, for example 85rpm. Multiply 20.78' x 85rpm /5280...convert from feet to miles, 5280 feet in a mile, = .33 now you have miles per minute, now multiply that times 60 to get miles per hour...20.07mph.

(672 x3.1415) /25.4) /12) *3) *85) /5280) *60 =20.07mph
(2111.08) /25.4) /12) *3) *85) /5280) *60 =20.07
(83.11) /12) *3) *85) /5280) *60 =20.07
(6.926) *3) *85) /5280) *60 =20.07
(20.778) *85) /5280) *60 =20.07
(1766.166) /5280 *60 =20.07
(0.3345) *60=20.07
20.07=20.07mph

Sunday, April 3, 2011

Epic Kinkle Cut Rotors

I saw this rotor when I came in today. At first I thought it was some kind of saw blade.
What normally looks something like this.
Wasn't there first hand. I'd have to Talk to Brother Zeke for more details, but no mater what, this item will have to go into the gallery of Epic WTF.
Talking about epic. How about Kin Lin down at 51st & Brookside. Mighty Tasty as always and yes those are krinkle cut french fries. Lunch was $5 even. They charge something like $4.63 so there isn't any change.

Friday, February 18, 2011

Bike Ride da 26th

Let the games begin . . .

Crusty made a good itinerary for the up coming bike ride, we'll keep it at that. Come one, Come All, if you seek fun, and posses a love for Bikes, Coffee, Beers, and Tubas.
2:30- ? Street Cred
6:00ish Benetti's
6:30-? Rhineland
????
?????
-
Some changes to the Gravel/Cyclocross/Do-All-To-All were made. I guess this is the 5th revision according to the last post I made about this construction.
After riding the first Cyclocross frame I built I decided to make a couple changes. I'm lowering the bars 5mm and moving them out 10mm/1cm. I also increased the seat tube angle 1 degree, this will give the rear tire a little more room to preserve the short chainstays.
-
I've also decided to route the derailleur cables under the bottom bracket. I see some frame builder route them on the top tube, but this just adds another piece a cable housing for the rear derailleur . . . Guess I could be tricky and route that internal to. However I also see a lot of builders route them under the bottom bracket. I've heard the pro and Cons and it's 50/50.

Then route the rear brake cable through the top tube. I figure it would be a fun thing to try, and for mounts and dismounts why not eliminate knocking around the brake cable?
-
Parts List: - Brake bosses

So without Brass, Flux, Acetone, Sandpaper, Paint, and . . . ? . . . bandaids I'm looking at $175. I see Surly Cross Checks selling for $400. I suspect other froms made from double butted 4130 are around the same price range.
-
If your trying to build a frame to save money, believe me the grief you will save yourself will be well worth the $225. I suspect it might take me around 40 hours to build this frame which works out to roughly $5.65/hr . . . minus Brass, Flux, Acetone, Sandpaper, Paint, and . . . ? . . . bandaids; and that's if those price are still good, seen the prices of things lately? . . . now that's another rant for another day.

Sunday, January 30, 2011

Inch Pitch in a Pinch

A vintage (Vintage: Characterized by excellence, maturity, and enduring appeal; classic.)
Western Flyer bicycle came into the shop this week. From the definition I'd say more than anything it has enduring appeal. Who wouldn't want to get on this bike and go from a ride around the neigborhood?


The frame features a step through design. Today most people would identify this frame as a "Lady's" frame. However "Step-through" is a better description. Ladys who would wear skirts found the diamond frame cumbersome to get on and off of, so they lowered the top tube so then ladys could "Step-Through" the frame to get on the bicycle.


A distinguishing feature of this bicycle is the Inch-Pitch chain and skip tooth gears. As you can see the chain's pins alternate 1/2", 1", 1/2" . . .


. . . and the cog skips every other tooth to permit the 1" chain plates to ride between the teeth. I don't know why they used this protocol for bicycle chains and gears. I can only suspect it was because they borrowed it from machinery from the 2nd industrial revolution.
-


Is that a seat or a saddle? I think it's more looks than function. Did you know Brooks still makes saddles like this one?
-


Simple . . . yet simple.
-

Speaking of simple, Ben at Benetti's does it again. I found a new favorite . . . Sulawesi Kalossi . . . and I can simple call this coffee . . . "Dangerous" . . .

. . . I call it dangerous because you can drink this coffee all day. As they say it's very clean. Could this coffee be the Golden Ratio?

Thursday, January 20, 2011

Marrzochi 2001 Bomber Z2 Atom Sport Once Over and Snow Ride

Yes 2001. Maybe I should call this post . . . "2001: A Marrzochi Fork Odyssey"? Because just like the movie, I consider this fork an epic for all time. The fact that it's 10 years old and it works as good as the day it left the factory says something. I'm sure that this fork's success has to do with it's simplicity. I have a saying, "Dazzle me your your overcomplication of the simple".

It's my opinion some forks out are over complicated. To me these features become more of a liability than advantage. For example I had a fork that had
1) positive air pressure,
2)negative air pressure,
3)dampening for positive,
4)dampening for negative,
5)adjustable lockout blowoff valve.
-
I look at it as a fork with 5 points of complication. Even with all these features it still doesn't make it perfect for every part of the trail, and this is coming from a hardtail perspective . . . If you have a full suspension MTB now your bring another dynamic into the mix. So nothing is perfect. It's just amatter of how much are you short of perfect. So if your fork with just 1)air pressure and 2)dampening brings you to 8 of 10, is changing to a fork with 3 more adjustments . . . or points of complication . . . that brings you to 8-1/2 of 10 worth it?
-
If I was a professional, and I didn't have to buy my own equipment; or I was independenly wealthy, I think I'd go with the more complicated fork. For every point of complication, is a point you have to maintain. In my experience it's always easier than done. To put it another way, Henry Rollins says: "The more you own, the more it owns you".

Ok enough said. My fork has been working fine, but I can't remember when the last time I changed the fluid in my fork. It's always good to give it a once over. Check the oil to see what color it is. The first think I look for is if the old oil has a silver tint to it. If it has a silver tint then that means there is aluminum in the oil. This means something maybe mis-aligned, worn out, or broken. More than likely it's a symptom of something that is about to be worn out.
-
Also over time the seals can dry out a bit. It's a good thing to give them a little cleaning, and a wipe down with fork fluid.
-
The manufacture suggests the fork fluid to have a viscosity of 7.5. The cycle shop by my house "Mikes", has some Bel-Ray 7wt on hand. . . . btw I like Mike's cycle shop.
*****
Mikes Cycle Center
9615 E 63rd Street
Kansas City, MO 64133
(816) 356-2453
*****
I had a few questions about fork suspension and the questions he couldn't answer he looked up on the internet right there. He had a genuine interest in my needs and wanted to help as well as gain knowlege by finding the answers . . . or as we called them "facts" and not just "here say". Even though he has a "Motorcycle" shop and I was there about a "bicycle", he had the attitude of, Wow that's cool, I'd like to learn more about this. . . . We are more a like, than different.
-
In stark contrast I was at another cycle shop earlier that day ( . . . just happened to be passing by . . . ), and the fork fluid they had didn't have the viscocity on the bottle, but they were sure it worked . . . . Mmmmm maybe I'll pass.
-
The viscosity of the oil plays a part in the dampening adjustment. When you adjust the dampening, you adjust how fast the fork returns to it's original position after the fork compresses. Too little dampening, and your front wheel with return like a pongo stick, too much dampening and your fork won't return, and you will bottom out the fork. You can adjust the rate by adjusting the dampening valve.
-
I don't always run the dampening at the same rate. I adjust it for different trails and trail conditions. Marzzochi suggesst 7.5wt, but you can also use 5wt, 10wt, or I've heard of people mixing their own custom weights. The question you might have is why change the weight of the oil, when you can adjust the dampening rate. If you weight 100lbs, you will not be able to get all the adjustability from your fork as if you weight 165lbs. If you find you have the dampening valve all the way open, and you still want more dampening, you can change the oil in your fork with a heavier weight to achive that for example.

The fluid looked more grey from normal use, than silver. I've taken forks apart where the fluid looked more like liquid metal than oil.

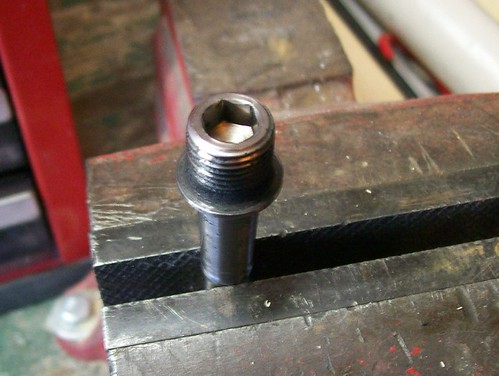
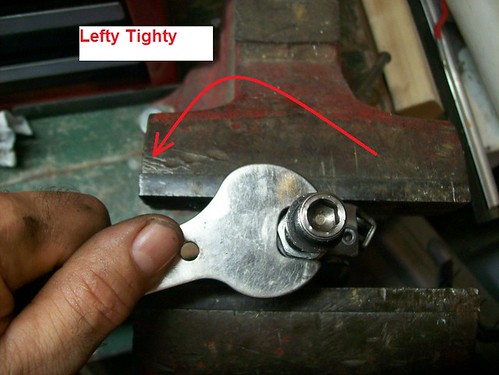
After the oil is out, now I can take the fork legs off, You can get the non dampening side off with a long 15mm and extension, but the dampening side requires a very long 15mm socket to go over the dampening adjustment spindle.

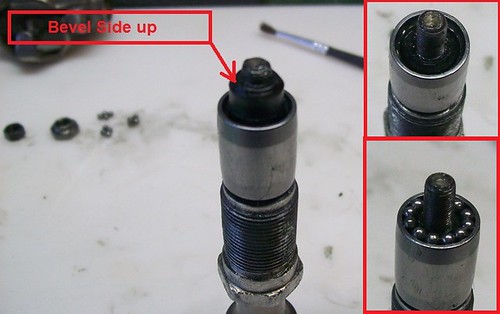
Once the legs are off then you are going to need lockring plyers to take out the internal parts. It's important to lay them out in the order and side they came off. The inspection reveals everything is in perfect condition. The parts all have their anodizing, and the action is precise and smooth. The dampening valve holes are uncloged. Nothing to do here, ready for re-assembly.

Putting the fluid back in. All manufactures have a suggested level range. For example for my body I can fill each fork leg till the fluid comes to within 35mm to 45mm to the top of the fork leg when the fork is compressed. Add the fork fluid til it's about 50mm from the top, then cycle the fork up and down to purge the dampening valves of air. then add fluid till it reaches 35mm to 45mm of the top of the leg when the fork is compressed. This creates the "Air Chamber".
-
The lower the fluid level, the larger the air chamber; the higher the fluid level, the smaller the air chamber. The larger the air chamber, the softer the ride, but alone with a soft ride comes a fork with a lot of dive.
-
Dive is the amount of linear movment it takes your fork to stop compressing. For example lets say your fork's initial PSI is 30psi, you ride off a rock and the drop requires fork to stop compressing when the air pressure reaches 90psi. A large air chamber will require the fork to travel further to reach 90psi. than a fork setup with a smaller air chamber.
-
I'm going to ride this fork on the soft side. This fork has 80mm of travel. Dive will not be as noticable with 80mm vs. a fork with 120mm of travel. I like a soft ride.


The finally adjustment is the air pressure. I'm going to start with 30 psi. Another adjustment is Sag factor. It's the amount the suspension sags when the riders weight is put on it. For example you might want to have a 20% sag factor. 80 x .8 = 64mm. you want the air pressure set to were your static weight compresses the shocks enough to leave 64mm of compression travel.
-
This leaves 16mm of travel for depressions in the trail so your front wheel remains in contact with the trail. Remember this is suspension. You are suspended . . . suspended on a pillow of air.

Yesterday morning I got to ride it a bit. As far as mechanics go, the fork doesn't leak fluid or air, and it didn't fall apart. But it's not the trail. guess I'll have to wait. It handled pretty good on the way home too, as far as I could tell. After a short ride I decided the snow was going to be too much. I had some problems.
1)The snow was a little to deep for the tires.
2)There was Ice under the snow in mystery places.
3)I had rush hour traffic.
When the snow is high like tonight, you have to ride in the road, in the car tracks. People in cars hate this. So what you do is look back, ride as far as you can before the car behind you gets close. When they get close you get off to the side of the road, let all the cars by, and repeat. Stop, Go, Stop, Go, . . . . . . and it's not fun for me as well.


So I hopped on a bus. The bus can get around good in the snow. The bus is a backup plan I have. A $1.50 get me to where I need to go. However my connection was running 35 minutes behind. That wasn't fun. I think I had 3" built up in my ventholes by the time my bus got there.

Like the Bus says . . . Bike!